The return of rhubarb (from the deep freeze)

DSC00066

When I froze rhubarb last summer, I had no idea how happy I’d be to find it in the freezer during the winter that refuses to end.

I had smartly cleaned and chopped the rhubarb, then portioned it into two plastic bags. If only I’d written the amounts on each bag. I vaguely remember thinking I would remember. Of course, I didn’t. Lesson learned.

I thawed the rhubarb on the counter — in a color-coordinated rubber colander — for a couple of hours while I figured out what to do with it. Since we’ve been eating healthier over here, a sugary crisp was (unfortunately) out of the question. But muffins are, to me, always justifiable “junk,” especially if they’re topping-less. (Topping equals cupcake, in my book.)

DSC00070A quick search revealed this recipe for rhubarb blueberry muffins. Jackpot! I was intrigued that sour cream was on the ingredient list, I had frozen blueberries in the freezer that I’d bought but never used for smoothies, and I knew there was at least a cup of rhubarb.

(As it turns out, I had a cup and half of rhubarb, which explains why I used two bags. I tossed it all in. No harm, no foul.)

The muffins were moist and flavorful, and the recipe easily yielded 18 instead of an even dozen. When I have more rhubarb, I’ll make them again.

Now, what to do with that frozen okra …


Love for the Buddha bowl

We’re big fans of one-bowl meals. So when Buddha bowls began popping up on menus around the neighborhood, I was immediately intrigued. And, of course, I couldn’t resist trying to recreate them at home.

Easy peasy — especially when you keep it super simple.

I start with brown rice:

DSC00108

Add spinach sautéed quickly in olive oil:

DSC00110

Then chicken cut into bite size pieces (this is boneless, skinless chicken thighs baked without seasoning to 165 degrees):

DSC00111

And then shredded carrots, steamed, and a few dashes of soy sauce:

DSC00116

Lastly, top with a fried egg. (Side note: I knew I’d succeeded when Mike walked in the kitchen, saw this and said, “Hey! It’s one of those Buddha bowls!”)

DSC00118

It doesn’t stay pretty for long, once you dice the egg to mix the yolk with the rice, chicken and vegetables:

DSC00122

It also won’t stay full for long. Seriously, it’s that good. (And did I mention easy?)

For those who like it hot …

After my salsa teacher Jerry read my post about making his tomatillo salsa, he sent the following recipe for the spicy salsa I didn’t commit to memory during our Mexico City trip. For those who like it hot, enjoy! 

For the hot chile and oil, just as easy. Find the long thin small red chilies. They are dried whole and sold loose or in pre-packaged cellophane bags. In Mexico “chiles de arbol” or I’ve seen them in English “Chinese chiles.” You can use any other dried chiles as well for different flavors — chile pasilla, chile guajillo, ancho. Find them in a Mexican grocery.

Heat a pot of good oil (I always used olive) to just shimmering or just before smoking. Take off the heat and let cool a bit. Take as many dried chiles as you want — both in terms of heat and consistency (more is hotter, more concentrated and thicker). Throw them in the oil and stir to get them somewhat submerged into the oil. They should almost fry but not burn. Throw in a clove or two of garlic, and it will brown a bit.

Let it all cool down — either completely or until warm. This finishes the infusion.

Put all into the blender to liquify completely. Depending on your taste, you can leave some seeds “visible” or process until not visible (I usually completely liquified it). Then, into your jar or serving dish and … voilá.

Like the green salsa, this is more of a sauce condiment than a tortilla-dipping salsa. With either the green salsa or the chile oil salsa, blend with sour cream (or crème fraiche) and softened cream cheese for a spicy chip dip.

Bon appétit.

Mashed potatoes repurposed

Gnocchi

I blame my mother for having recently made twice as many mashed potatoes as two people could possibly eat.

We were on the phone as I was peeling potatoes, and she convinced me that four potatoes probably wasn’t enough. So I threw in another one, bringing the total to five. Again, for two people. Ridiculous even when you consider how much Mike likes (make that loves) mashed potatoes.

Even though he could’ve fashioned himself a Devil’s Tower to rival Richard Dreyfuss’ with the mound on his plate, there were plenty left over. (“Enough for thrashers,” as Mom would say.)

Growing up, second day mashed potatoes meant hamburger pie, otherwise known as my least favorite meal ever. Imagine ground beef mixed with tomato soup mixed with green beans and topped with mashed potatoes then baked in a Pyrex bowl. I know, gross.

But Googling “leftover mashed potatoes” yielded a super fast and easy — and far less disgusting — solution: gnocchi.

After reviewing a few recipes, I surmised that I simply needed to mix the leftover mashed potatoes with about half the amount of flour and one egg. I eyed instead of measured the mashed potatoes, estimating there to be just over two cups, so added the egg and a little over a cup of flour. After I mixed it with a fork, I kneaded the dough by hand until I had a non-sticky ball. I divided it into three equal portions, then rolled each into a rope the thickness I wanted for my gnocchi and cut it into 1-inch pieces.

The cooking was even easier. I simply added the gnocchi to a pot of salted, boiling water and waited for the gnocchi to float to the surface. I topped the cooked gnocchi with a jar of sauce stashed in the pantry, and added a side of steamed broccoli.

Quite possibly the easiest dinner I’ve made in eons.

Next time, and there will be a next time, I’ll experiment with adding a spice to the dough — Mike thought it was delicious but “missing something.” Still, an impressive first effort.

Tomatillo salsa

photo 2

I’ll admit it: I’m a recipe follower.

But when Mike and I visited our friend Jerry in Mexico City last Christmas through New Year’s, we whipped up a batch of tomatillo salsa. (I was intrigued that the salsas served there were completely different than our standard tomato-jalapeno-onion-cilantro varieties.) Since making salsa was one of many things on our docket one day, I wasn’t able to take the time to write down each step of the process. Instead, I “helped” — OK, mostly watched — as Jerry raced through at breakneck speed. Without a recipe. Eek.

Side note: Jerry and I actually made two salsas: the less spicy tomatillo one for me, and a much spicier red pepper and oil variety for Mike. Since anyone who knows me well knows that I tend to shy away from all things spicy, it should come as no surprise that I didn’t commit that second recipe to memory. Sorry, Mike.

I eagerly awaited the appearance of tomatillos at the farmer’s market this year, and after spotting them a few weeks in a row, finally got my nerve up to attempt making the green salsa at home.

Easy. Peasy.

Seriously. All that was required were tomatillos, hot pepper, garlic and onion. And a blender.

photo

First, take the tomatillos out of their little cocoons and rinse them in a colander. They’re kind of sticky, surprisingly. Then, put them in a pot of boiling water with a pepper or two, depending on how much heat you want your salsa to have. (I used one pepper, and felt very brave.) Boil until the tomatillos turn a bright vibrant green, but don’t cook them.

photo

Place the tomatillos and pepper(s) in a blender, and add the onion (I used a medium white onion, cut into chunks) and garlic (one large clove, cut in half, for this batch).

photo 1

The key, according to my salsa master Jerry, is to also blend in some of the water from the pot. Seems this salsa gets very thick, and the water keeps it from becoming cement-like. I put in a couple of ladles, an estimated half a cup to a cup. The amount was spot on, as the mixture fit perfectly in a canning jar, and wasn’t too thick or thin after setting.

The end result: Salsa spicy enough to truly qualify as salsa, but not so spicy that I couldn’t enjoy it. I was so proud of my effort that I brought it to my family’s annual campout, where cousins enjoyed it with homemade chicken quesadillas.

Sorry, no photo of me patting myself on the back.

Tomato tart

Most home gardeners — and even CSA subscribers — end summer with a plethora of tomatoes. Once upon a time, when I was single and living alone in the Detroit suburbs, I planted six tomato plants in my backyard, not realizing how many tomatoes each one would produce.

Wow. That was a lot of tomatoes. (Unbelievably delicious tomatoes, I might add.)

That’s the summer I learned how to make a tomato tart. It’s easy, it’s tasty, and it uses up a lot of tomatoes as well as basil, if you have an excess of that, too.

To start, you need a crust. To simplify the process, you can buy a frozen pie crust. Or, you can whip one up. Seriously, making pie crust from scratch doesn’t take long, and if you don’t use a tart pan (shallow pie-type pan with a bottom that drops out), you can roll the dough out right onto your baking sheet.

I always use my grandma’s pie crust recipe, which is also my go-to crust for apple pie. She passed away when I was in the second grade, but I don’t think she’d mind if I shared it.

FLORENCE’S PIE CRUST

Ingredients
1 cup flour (I use all purpose)
1/2 cup shortening
1/4 cup cold water

Instructions
1. Preheat oven to 450 degrees.

2. In a bowl with a wider base, cut the shortening into the flour with a pastry blender.

3. Once the mixture has turned into little balls, add the water. Keep mixing until you’ve created a ball of dough.

4. Remove the dough ball from the bowl. At this point, you can roll it out and put it in a tart pan or, like I noted a few paragraphs ago, roll it directly onto a cookie sheet. I used a tart pan for years, but just this summer realized that I like the way the finished tart looks when it bakes on a cookie sheet. More artisan, I guess.

5. Partially bake for about 7 minutes.

Yeah, that’s it. You can also use a food processor or stand mixer to make your dough. But to be honest, I find that’s a lot of cleanup for something you can accomplish in a matter of minutes with a little elbow grease, a bowl and a pastry blender.

Here’s how the rest goes.

TOMATO TART

Ingredients
About 4 tomatoes, less if they’re large, cut into thin wedges (Roma tomatoes work best, because they’re drier, but other varieties are fine, too. Just let them drain on a paper towel after you cut them up)
3/4 cup basil, chopped
1 1/2 cup shredded cheese (I like Trader Joe’s Gruyere and Swiss mixture but mozzarella is fine)
1/2 cup mayonnaise
3-4 cloves garlic, minced
Spinach, kale or Swiss chard (optional)

Instructions
1. Reduce oven to 375 degrees.

2. Arrange tomatoes on top of your partially baked crust. Try to fit them snugly instead of layering them.

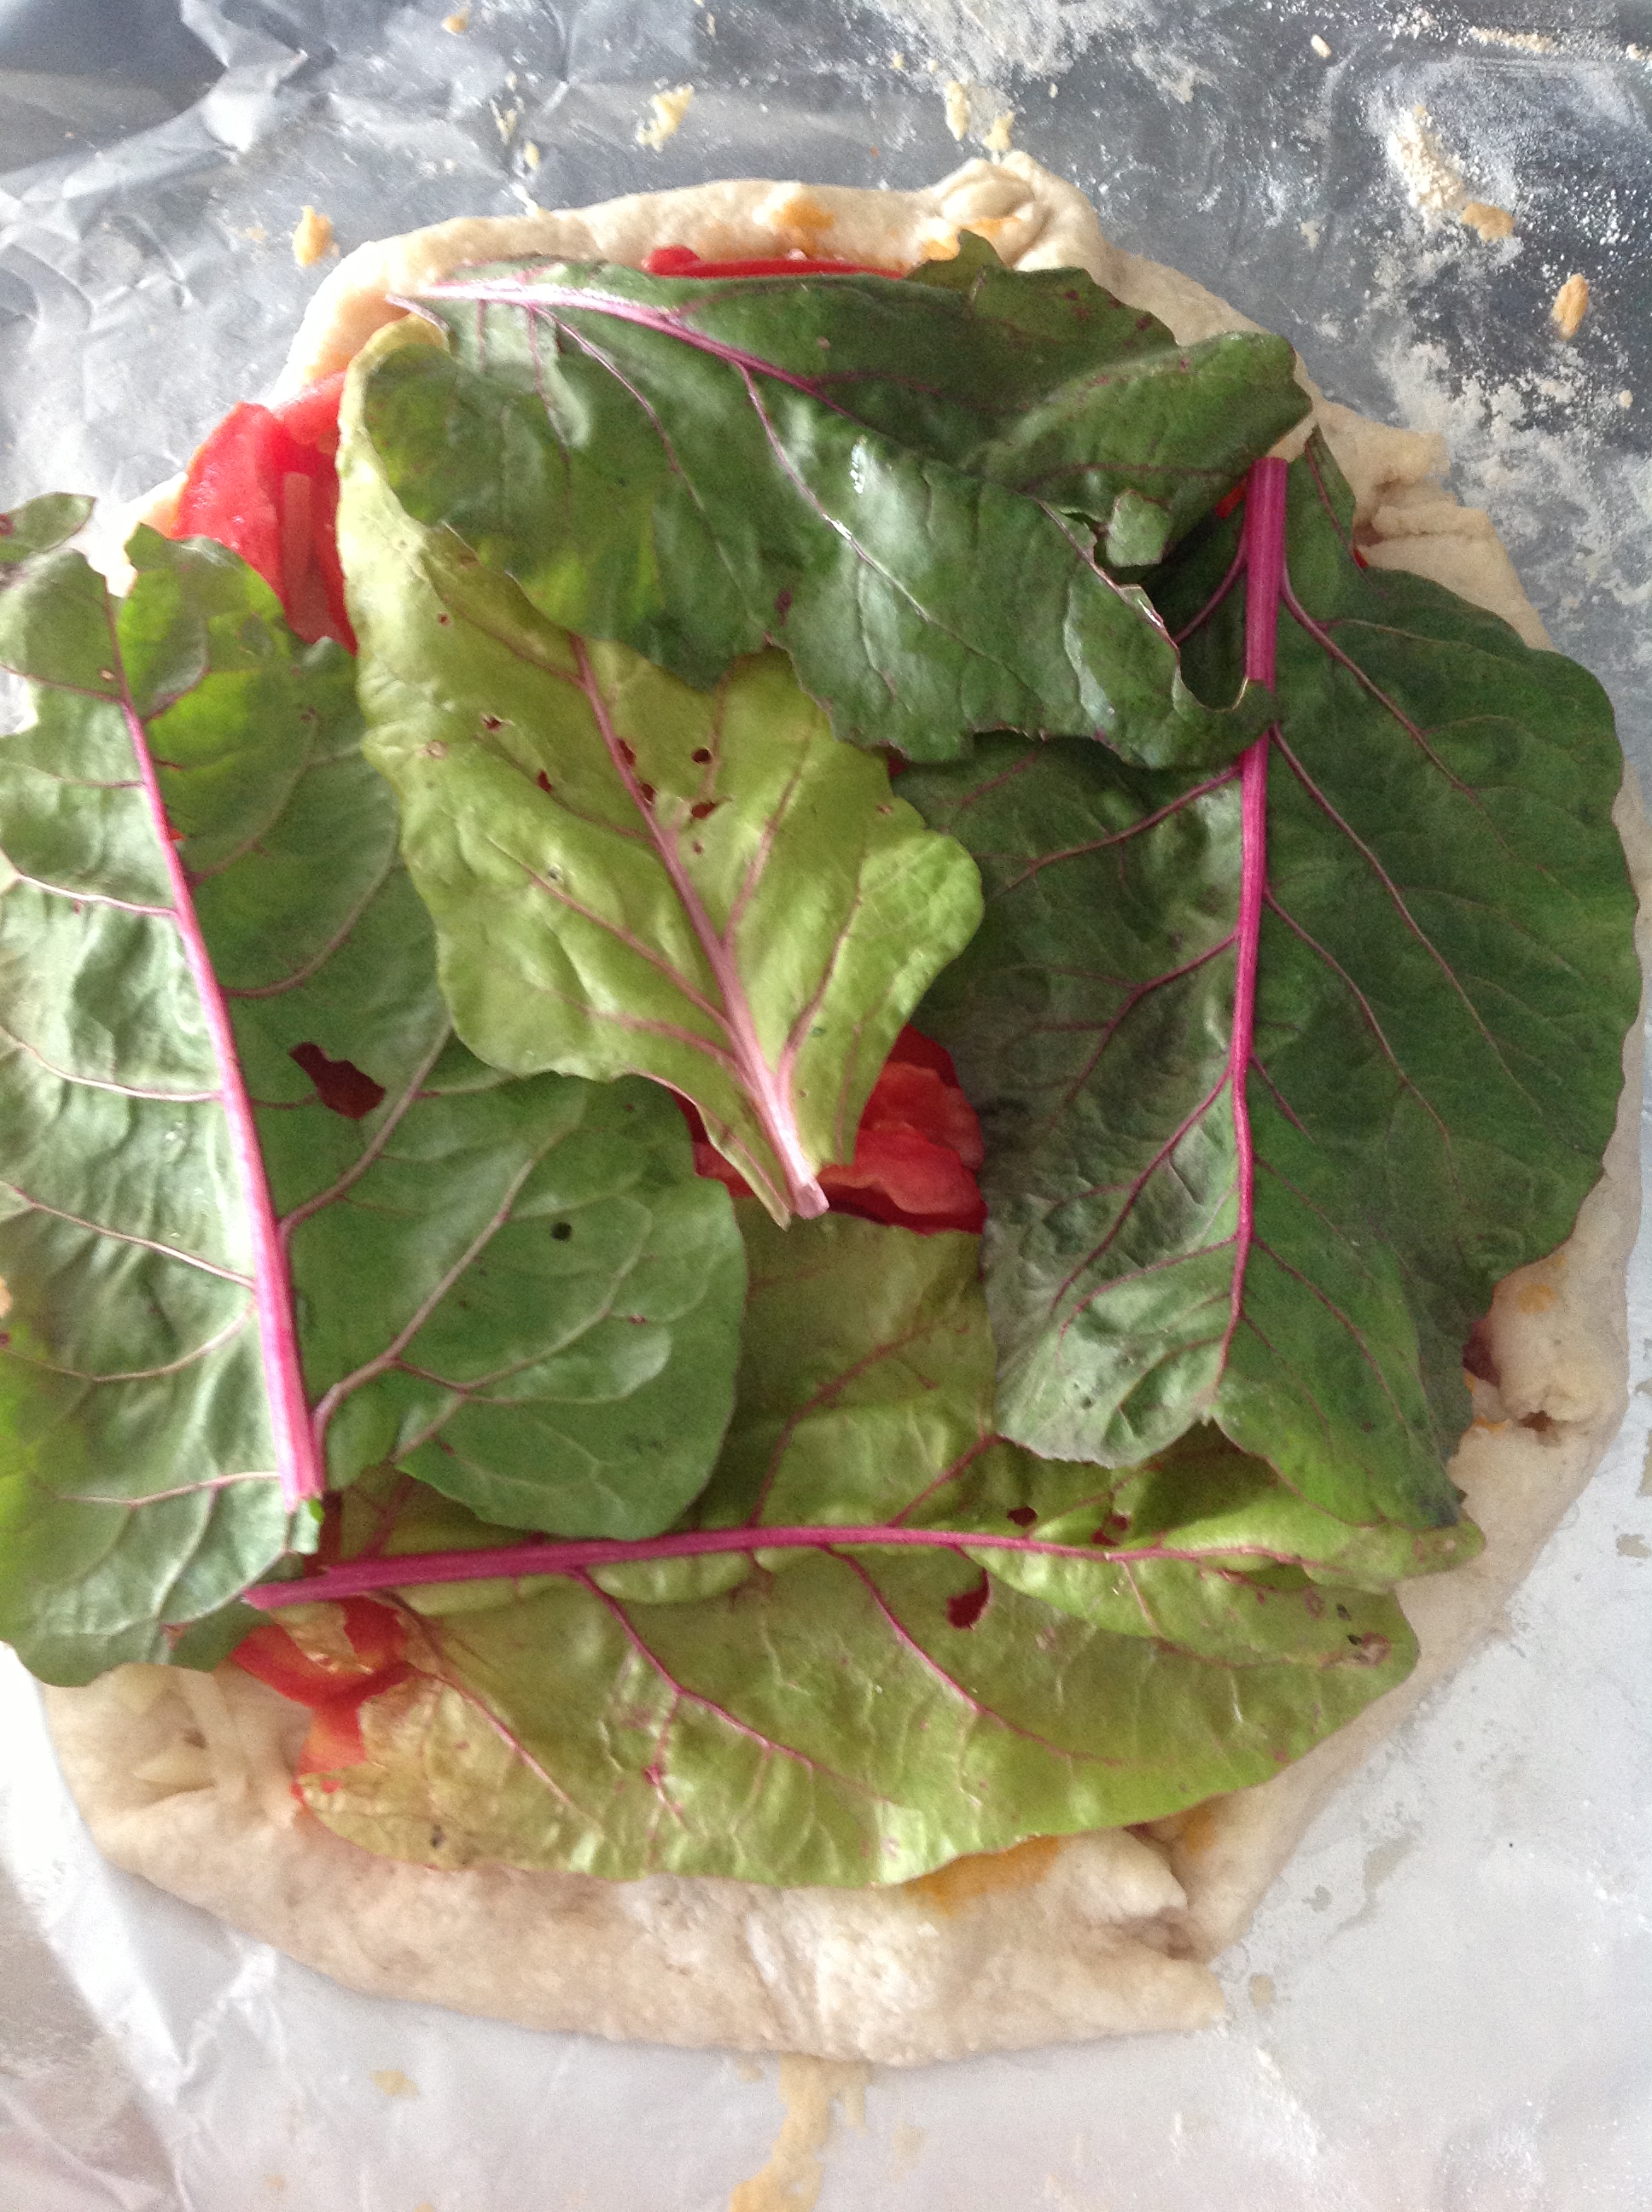
3. Layer greens on top of the tomatoes, if you’re using greens.

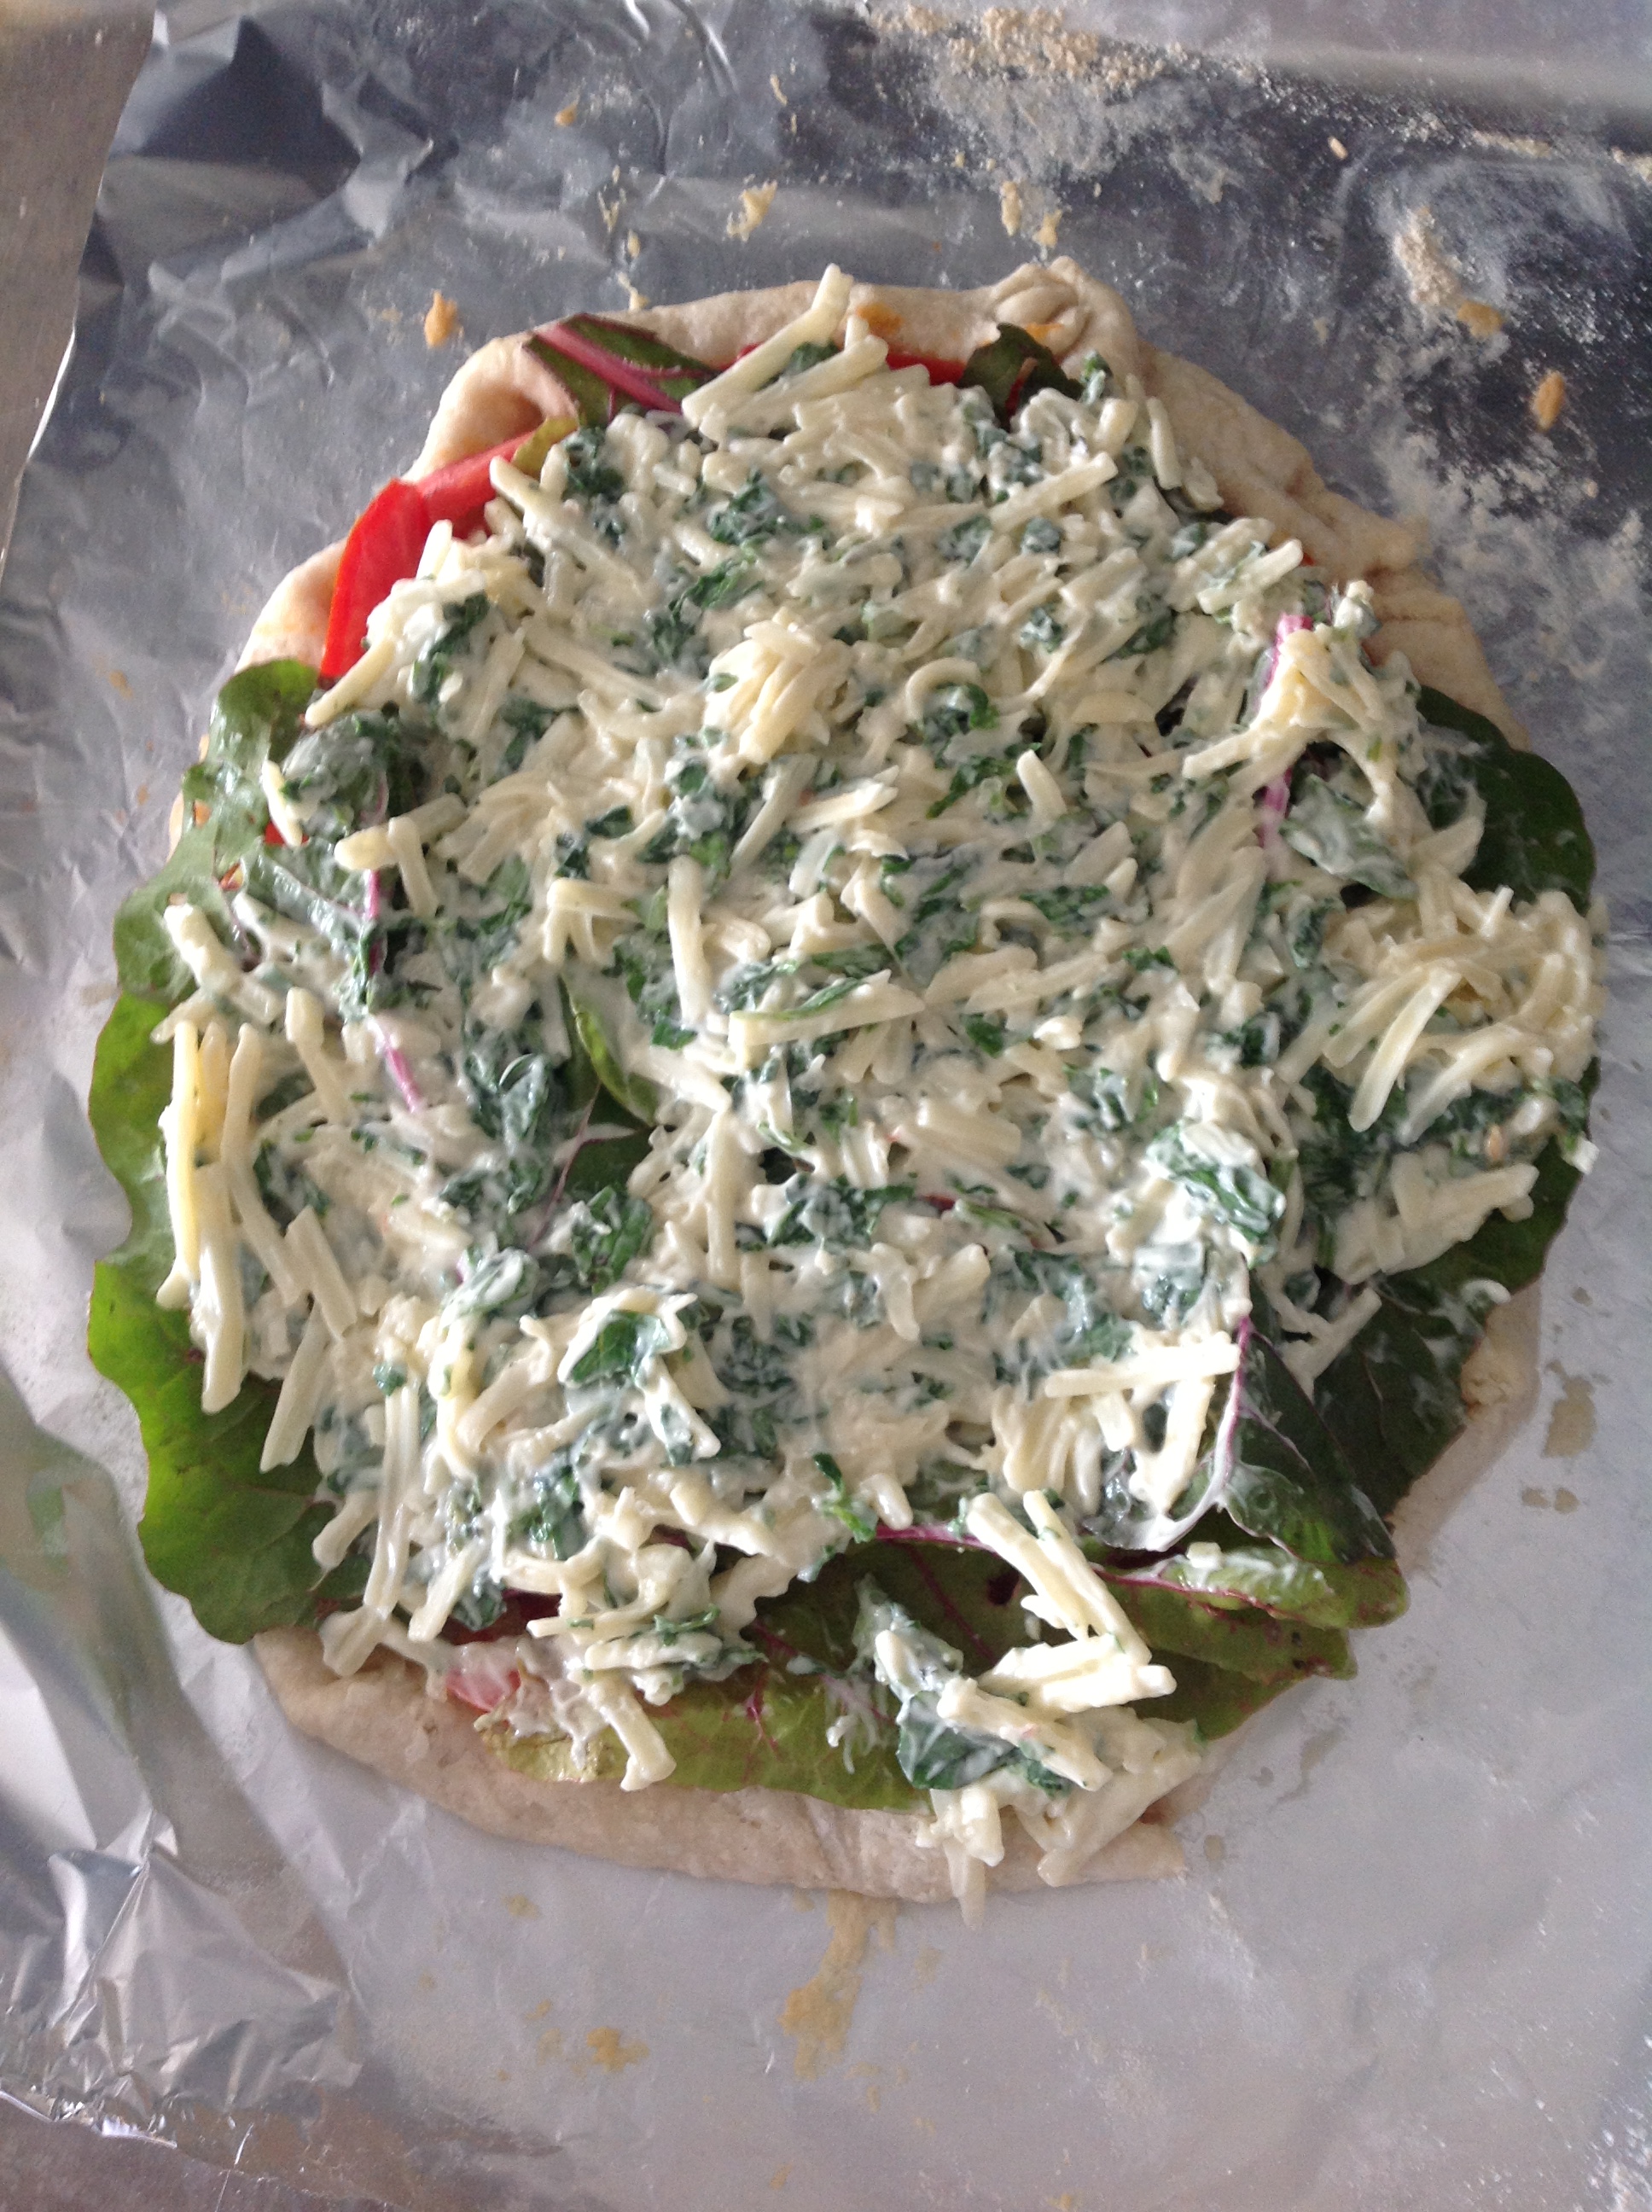
4. Mix together the basil, cheese, garlic and mayo. Spread the mixture on top of the greens (or the tomatoes, if no greens).

5. Bake for 20 to 25 minutes, or until the cheese is nice and golden. Let the tomato tart sit for about 5 minutes before diving in.

Here’s a partially baked crust with tomatoes:

photo

With Swiss chard:

photo

And then with the mayo mixture:

photo

Out of the oven and plated:
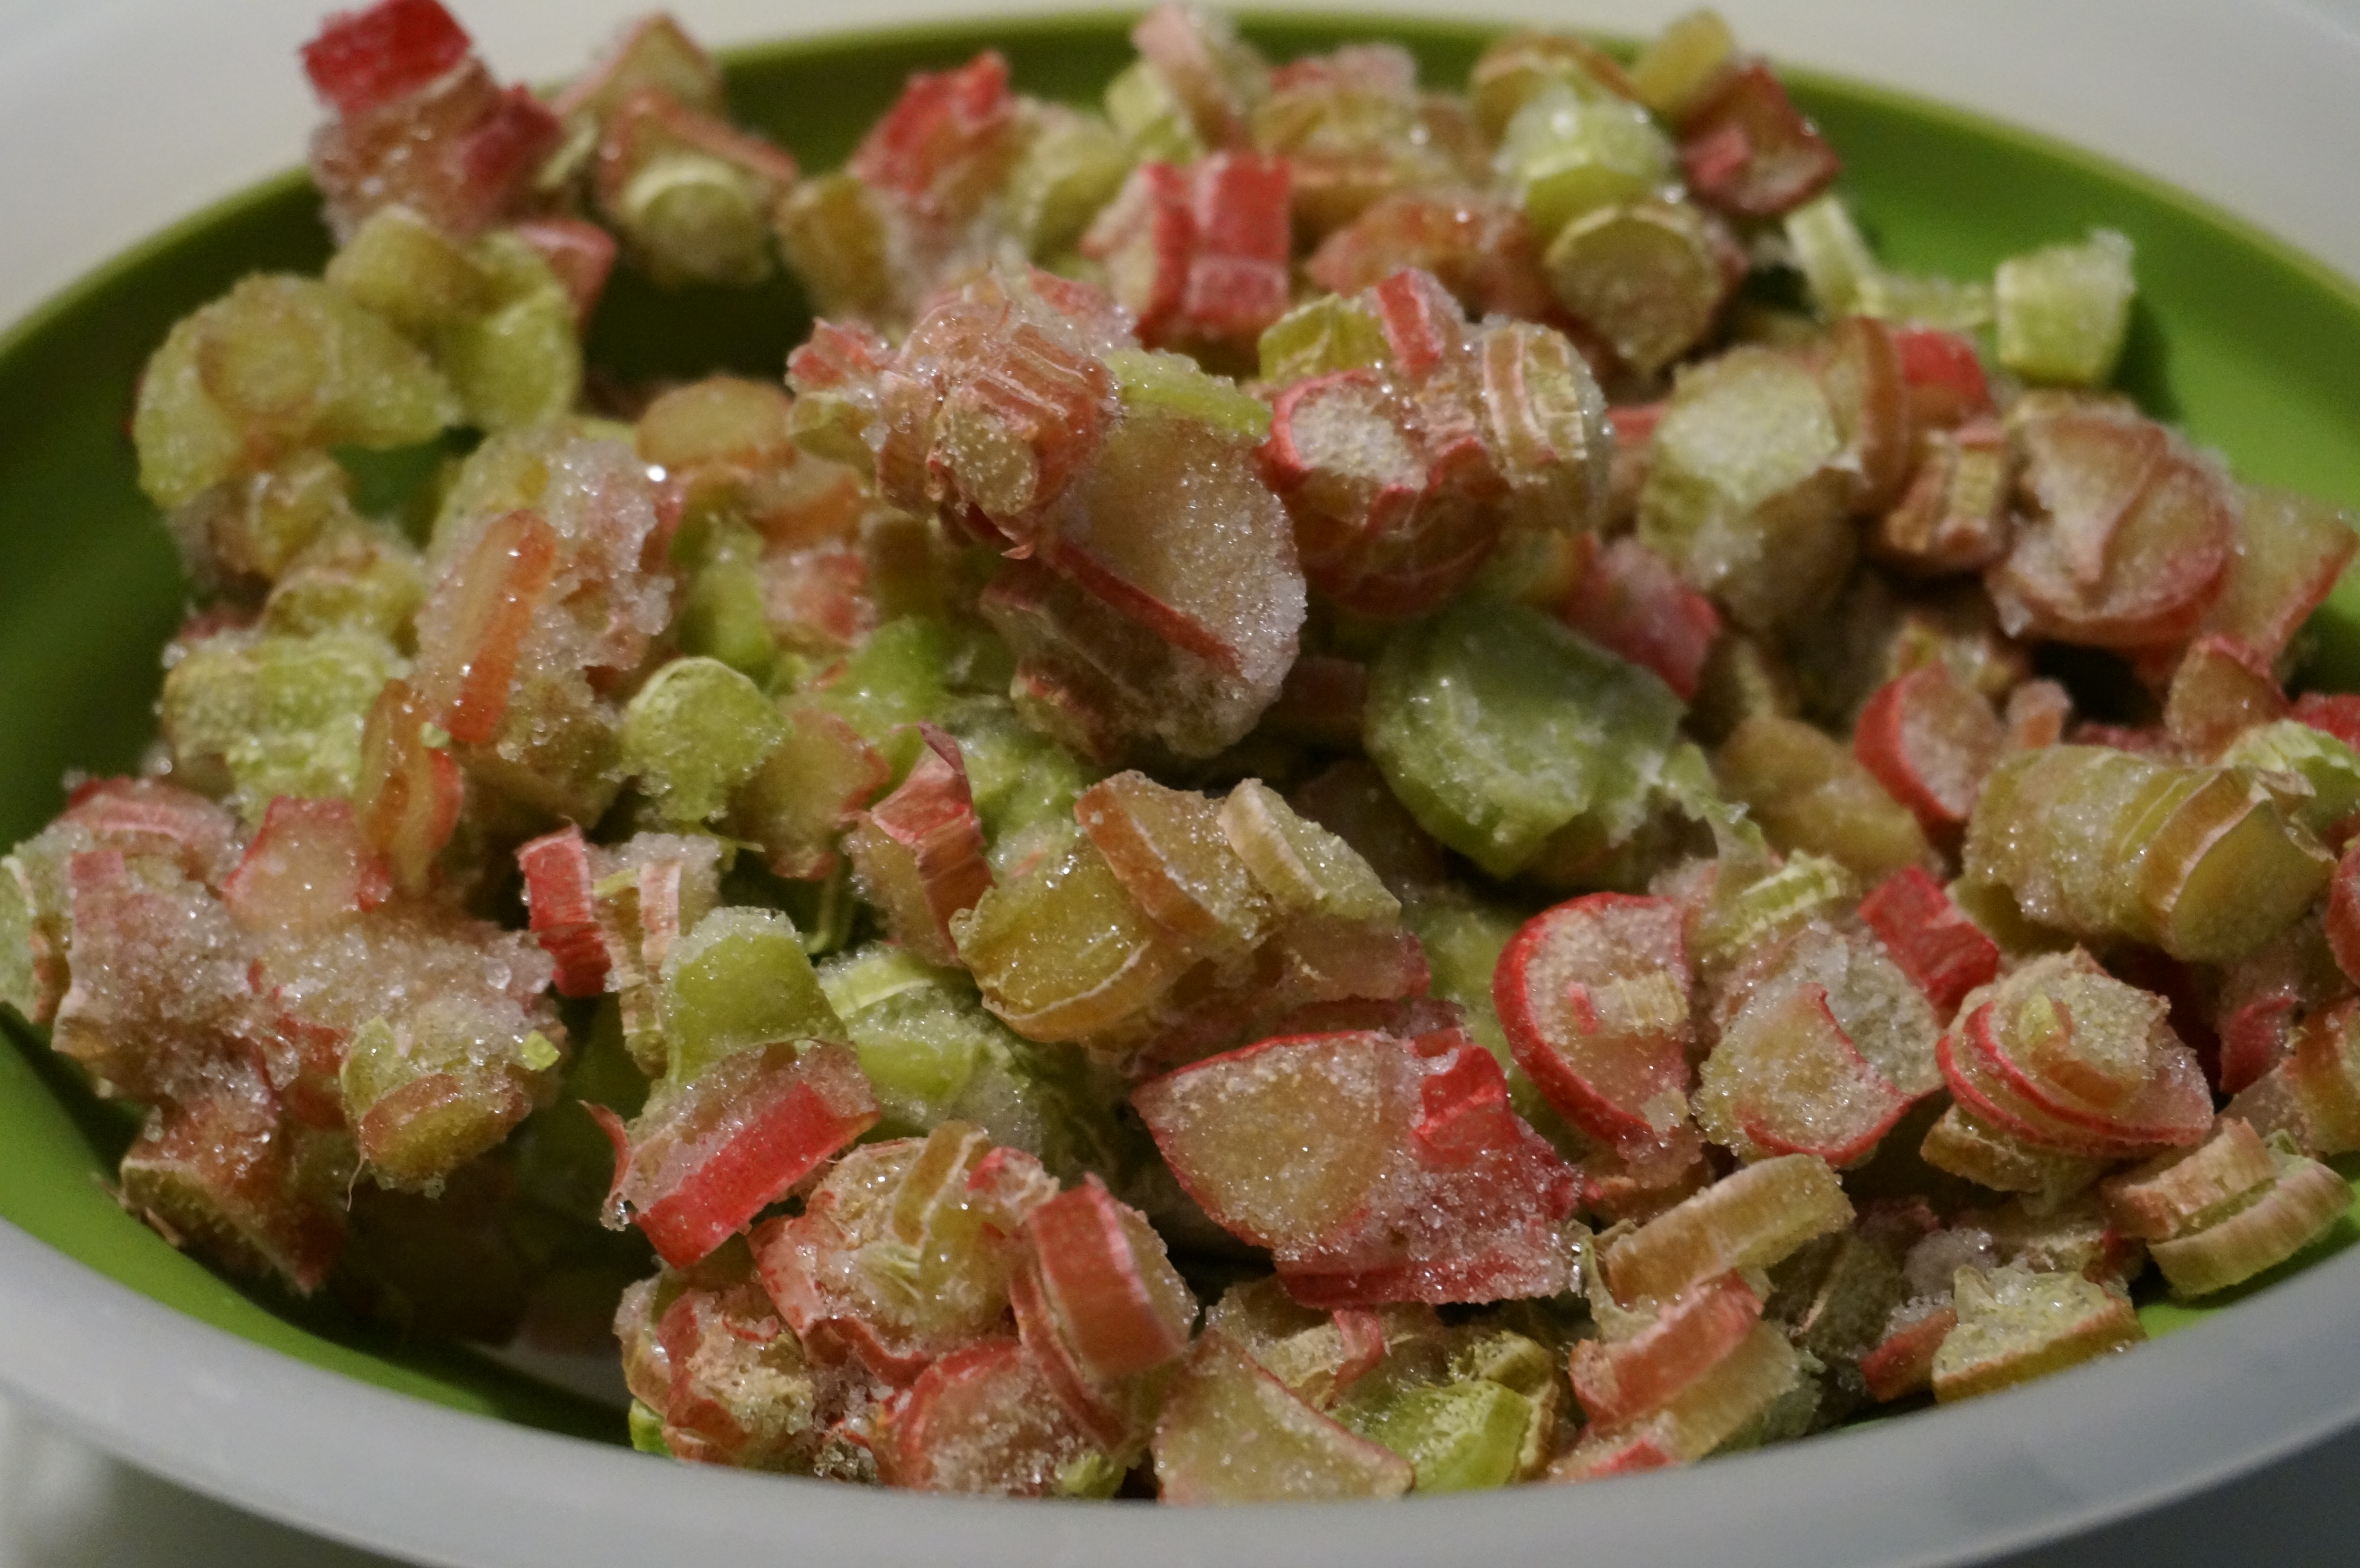
photo

Healthier coleslaw

One small cabbage — seriously, the tiniest I’ve ever seen — arrived a couple of weeks ago. If this year’s farm is anything like last year’s, I’m fairly certain that it’s the first of many to come.

The only issue: I have just three recipes in my repertoire that call for cabbage, and that’s including one for stuffed cabbage rolls. And this li’l guy’s leaves just weren’t big enough for those, which honestly aren’t any fun to make anyway. Plus, stuffed cabbage rolls taste much better on a crisp autumn day than during the summer. Ditto for beef stir fry.

So I turned to my go-to recipe for Asian coleslaw, which a friend gave me years ago. I don’t know where she got it from, so I can’t give credit, but it’s been modified along the way.

Since, again, this head of cabbage was the size of one Frodo might’ve grown in the Shire, I halved the recipe. We ate it alongside grilled bangers from the farmer’s market. Yum on both counts.

ASIAN COLESLAW

Ingredients
8 cups cabbage, thinly sliced (I lazily grated mine in the food processor)
1 cup carrot, julienned (I bought whole carrots and grated them in the food processor, too)
3/4 cup sliced green onions
1 package Ramen noodles (throw away the spice packet)
1 tablespoon sliced almonds
1 tablespoon sunflower seeds
1 tablespoon sesame seeds
1/3 cup rice vinegar
2 tablespoons sugar
2 tablespoons canola oil
2 teaspoons dark sesame oil
Kosher salt and freshly ground pepper

Instructions
1. Place cabbage, carrots and green onions in a large bowl and toss. Break up Ramen noodles, add and toss again.

2. Toast the almonds, sunflower seeds and sesame seeds until they’re just beginning to brown and become fragrant. Add them to the bowl, and toss the mixture one more time.

3. In a small bowl, whisk vinegar, sugar, oils, salt and pepper. Pour on top of the vegetables and nuts and mix well.

4. Cover and refrigerate for at least an hour.

photo

The rub

Our grill definitely gets a workout in the summer. Unfortunately, I realized in June that I’d developed a (bad) habit of soaking whatever meat was up that night in bottled marinade and calling it a day — not really copacetic with the conscious effort I’ve been making to avoid the prepared and processed.

Plus pork tenderloin and chops are our favorite, and marinating was really overkill. But a quick search revealed that a rub would be perfect, and not difficult to make from scratch. After experimenting with a couple I found online, we’ve become very attached to this rub recipe from the This Little Piggy Went to the Farmers Market blog. The rub doesn’t overpower the natural (and delicious) flavor of the pork, and the spices in it are ones I always have on hand.

The spice mixture:

IMG_5847

Chops on the grill, après rub:

IMG_5874

Rocking lobster

risotto

While wandering through the frozen food aisle at Trader Joe’s post-holidays, I came across lobster tails. And at a typical Trader Joe’s low price — score!

I immediately began plotting to make artichoke and lobster risotto, a recipe I’d learned during an awesome culinary boot camp weekend at Kendall College. Unfortunately, we’d worked in pairs on that one, and my partner was a little greedy with the mixing and the stirring (basically, she let me ladle in the broth and cut up the lobster) so I’d actually learned very little. But the end result was delicious, and I hadn’t shared the leftovers with Mike after class because, well, did I mention it was delicious?

Lobster tails in hand, I decided it would be the perfect dish for our 18-month anniversary dinner.

I should add that my only other risotto-making experience involved barley and a recipe I half wrote down from an odd Canadian cooking show during my days in Detroit. Also good but, obviously, much different.

On the night of our anniversary, Mike arrived home to find me at the stove, 15 minutes into what turned out to be 30 minutes of steady stirring (in figure 8s, I’d gleaned that much from class). He asked if I’d received some texts he’d sent, that I hadn’t answered. Because of all the stirring.

“Don’t they have a machine for that?” he asked as I moved aside so he could toss the brussels sprouts roasting in the oven.

I kept up with my figure 8s and made a mental note to research, and perhaps invent, some sort of risotto-stirring machine.

Although one probably isn’t necessary. Less than 20 minutes later, we were on the couch feasting. Well, I was feasting. He was trying to capture a photo of our (delicious) meal for this post.

Love him.

RISOTTO WITH ARTICHOKES, PARMESAN AND LOBSTER

Ingredients
Artichoke hearts, chopped (I used a jar of artichoke hearts in water, because artichokes are a pain. Kudos to the first person who looked at an artichoke and said, “Hey, we can eat this!”)
1 pound of frozen lobster tails, thawed (about two medium)
4-6 cups chicken stock (I used a mixture of broth and stock, and ended up using 5 cups)
4 tablespoons butter, at room temperature
1 cup finely chopped onion
2 cloves garlic, minced
1  1/2 cups Arborio rice
1/2 cup brandy
3/4 cup grated parmesan
1/4 cup chopped fresh chives (I skipped these because the store was out)
Kosher salt and freshly ground pepper

Instructions
1. Rinse and chop artichokes.

2. Steam lobster for 8 to 10 minutes, until meat is opaque. (Mine took 8.) Cool for 15 minutes, then cut through the top shell lengthwise, remove the meat, and cut it into 1/2-inch pieces. Set aside.

3. Place chicken stock in a medium saucepan and bring to a boil, then simmer over low heat.

4. In a large saucepan (I used a 5  1/2 quart round Le Creuset French oven), melt 3 tablespoons of butter over medium heat. Add the onion and artichoke hearts and cook until the artichoke hearts begin to brown. Add the garlic and cook for 30 seconds, or until fragrant. Add the rice and stir to coat it with the butter. Add the brandy and simmer until the liquid is nearly evaporated, about 3 minutes. Add 1/2 cup of the broth, and stir (in figure 8s!) until its nearly absorbed, about 2 minutes. Continue adding stock 1/2 cup at a time, stirring constantly (in figure 8s!) and not adding more until the stock is absorbed. Cook until rice is tender but firm, about 20 minutes. (Like I said, mine took 30 minutes.)

5. Remove risotto from heat and stir in the parmesan cheese, the remaining tablespoon of butter, and 2 tablespoons of chives. Season with salt and pepper. Transfer to a bowl or platter (I just plated ours) and top with lobster and remaining chives.

*Complete credit to Kendall College for this recipe.