Giving okra the deep freeze

Okra takes an ice bath.

Okra in a refreshing ice bath.

So, gumbo didn’t happen.

I couldn’t find a recipe that I loved, which was OK because I didn’t feel like going to the market twice in two days. So I used the mild Italian sausage from yesterday’s trip with the second head of cabbage from the CSA for this Fettuccine with Sausage and Cabbage recipe I found on the website for Real Simple magazine. I used rigatoni noodles instead of fettuccine because, again, I didn’t feel like going to the market; tossed in two pressed cloves of garlic because I only had two shallots; and skipped the chives, because the ones in our patio container garden died during an extended porch railing repair project a couple of weeks ago. (Yet survived last winter. Sad.) Still, the dish was delicious. Mike is finishing it off — cold and directly from the pot — as I type.

Of course, the okra remained. And not just the okra from this week’s share, but what was in last week’s, too. I had to face facts: I wasn’t going to use it all — er, any of it — and the okra was doomed to suffer a slow death in the crisper.

Thankfully, this English woman on YouTube, who pronounces “okra” so adorably, made freezing okra seem super simple. I sorted through the two bags, tossing out a handful that seemed sketchy, and went to work.

Ms. Brit was right. Boiling okra for three minutes, immediately placing it in an ice bath for three minutes, then drying it on the counter before sticking it in a plastic bag could not have been easier. Our okra is now stashed safely in the freezer.

Here’s hoping I remember to use it.

CSA, hooray! Chapter 16

photo

Another weekend away resulted in beginning another week with an overwhelming amount of vegetables filling both crisper drawers.

And since I had a ukelele lesson last night, and Mike walked in the door from work right before I got home, we threw together sandwiches at 8:30 p.m.

At least we used one tomato of the four in this week’s share, leaving:

  • two heads of cabbage
  • spicy greens mix
  • sweet red and green peppers
  • kale
  • summer squash
  • okra
  • green beans
  • small watermelon
  • carrots (that I forgot to put in the photo)

I whipped up a beef, cabbage and carrot stir fry tonight, over Ramen noodles (again, no judging). I’m not sure why I’ve always bought shredded cabbage and carrots — the food processor got the job done in mere minutes.

When I was at the butcher buying tenderloin tips, I also picked some mild Italian sausage. Okra is next on the hit list. Anyone have a tried-and-true recipe for gumbo?

Tomato tart

Most home gardeners — and even CSA subscribers — end summer with a plethora of tomatoes. Once upon a time, when I was single and living alone in the Detroit suburbs, I planted six tomato plants in my backyard, not realizing how many tomatoes each one would produce.

Wow. That was a lot of tomatoes. (Unbelievably delicious tomatoes, I might add.)

That’s the summer I learned how to make a tomato tart. It’s easy, it’s tasty, and it uses up a lot of tomatoes as well as basil, if you have an excess of that, too.

To start, you need a crust. To simplify the process, you can buy a frozen pie crust. Or, you can whip one up. Seriously, making pie crust from scratch doesn’t take long, and if you don’t use a tart pan (shallow pie-type pan with a bottom that drops out), you can roll the dough out right onto your baking sheet.

I always use my grandma’s pie crust recipe, which is also my go-to crust for apple pie. She passed away when I was in the second grade, but I don’t think she’d mind if I shared it.

FLORENCE’S PIE CRUST

Ingredients
1 cup flour (I use all purpose)
1/2 cup shortening
1/4 cup cold water

Instructions
1. Preheat oven to 450 degrees.

2. In a bowl with a wider base, cut the shortening into the flour with a pastry blender.

3. Once the mixture has turned into little balls, add the water. Keep mixing until you’ve created a ball of dough.

4. Remove the dough ball from the bowl. At this point, you can roll it out and put it in a tart pan or, like I noted a few paragraphs ago, roll it directly onto a cookie sheet. I used a tart pan for years, but just this summer realized that I like the way the finished tart looks when it bakes on a cookie sheet. More artisan, I guess.

5. Partially bake for about 7 minutes.

Yeah, that’s it. You can also use a food processor or stand mixer to make your dough. But to be honest, I find that’s a lot of cleanup for something you can accomplish in a matter of minutes with a little elbow grease, a bowl and a pastry blender.

Here’s how the rest goes.

TOMATO TART

Ingredients
About 4 tomatoes, less if they’re large, cut into thin wedges (Roma tomatoes work best, because they’re drier, but other varieties are fine, too. Just let them drain on a paper towel after you cut them up)
3/4 cup basil, chopped
1 1/2 cup shredded cheese (I like Trader Joe’s Gruyere and Swiss mixture but mozzarella is fine)
1/2 cup mayonnaise
3-4 cloves garlic, minced
Spinach, kale or Swiss chard (optional)

Instructions
1. Reduce oven to 375 degrees.

2. Arrange tomatoes on top of your partially baked crust. Try to fit them snugly instead of layering them.

3. Layer greens on top of the tomatoes, if you’re using greens.

4. Mix together the basil, cheese, garlic and mayo. Spread the mixture on top of the greens (or the tomatoes, if no greens).

5. Bake for 20 to 25 minutes, or until the cheese is nice and golden. Let the tomato tart sit for about 5 minutes before diving in.

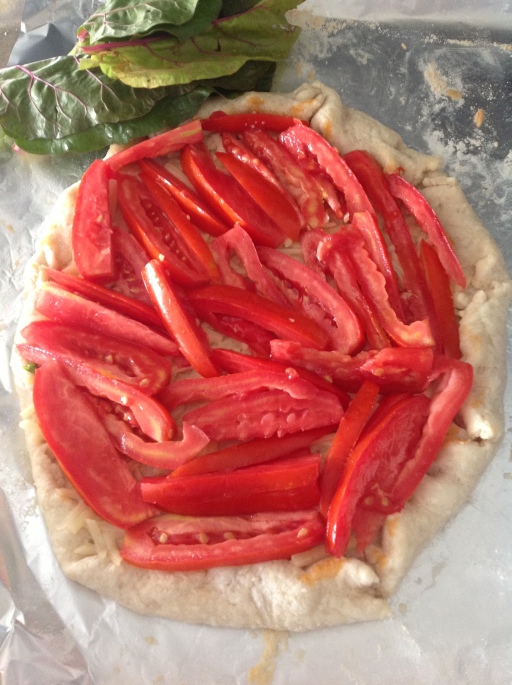
Here’s a partially baked crust with tomatoes:

photo

With Swiss chard:

photo

And then with the mayo mixture:

photo

Out of the oven and plated:

photo

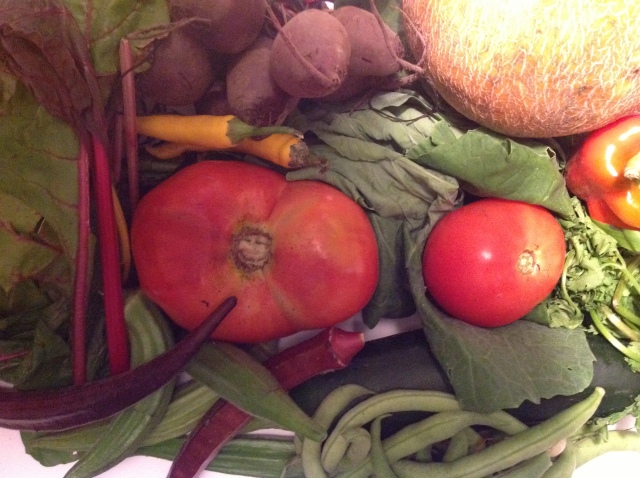
CSA, hooray! Chapter 15

photo

For whatever reason, I’m less enthused about this week’s CSA share than I’ve been about the others. I think I’m ready for the switch to fall vegetables (and sweaters!).

But beets did make their debut. Mike loves beets, which I typically roast. But these are pretty small, and wrapping them all in foil seems like a pain. Looks like it’s time to employ my well-seasoned Googling skills.

What else was in our share:

  • tomatoes
  • green beans
  • melon
  • okra
  • cilantro
  • peppers — green, red and hot yellow ones
  • Swiss chard
  • mystery leafy green
  • zucchini

I stir-fried boneless, skinless chicken thighs tonight, so have already used the green and red peppers, the Swiss chard and the mystery leafy green. I still have no idea what that leafy green was, even after giving it a quick taste before tossing it in at the end with the chard leaves. I finished the dish with a little Soyaki from Trader’s Joe’s, and served it over Ramen noodles, minus the spice packet. Don’t judge me — we were out of rice.

CSA, hooray! Chapter 14

I have confirmation from Farmer Tony at Scotch Hill Farm that the mystery vegetable from the last post was indeed kohlrabi. I didn’t know about the purple variety, and am excited to give it a try.

No picture this week, as we were out of town on Friday. But thanks to my cousin Matt, the following was waiting for us when we returned home — minus what he ate over the weekend as payment for picking up our CSA!

  • heirloom tomatoes (which are delicious and nearly gone)
  • cucumbers
  • kohlrabi
  • green beans
  • eggplant
  • melon
  • basil
  • arugula
  • peppers
  • Swiss chard

Help! What the heck is this?

We returned this afternoon from a long weekend in San Francisco to find this mystery vegetable in the refrigerator. (Huge thanks to my cousin Matt for picking up our CSA while he was in town dogsitting.)

photo

It resembles kohlrabi, except it’s purple instead of green. Also, it’s not smooth or ball-shaped. Hmm.

Scotch Hill Farm’s internet is down, so we didn’t receive an e-mail detailing last Friday’s CSA share. And this guy isn’t featured in the weekly photo the farm posts to its Facebook page.

Any thoughts?